
We’ve been working hard on the schoolhouse project since March and a lot of progress was made since the last blog post. It’s really cool to see the space be transformed and get closer to what we want it to become.
We are aiming to have all the renovations done by the end of summer and so that we are able to hold classes in the space this fall. Some days, it feels like that goal may never be realized, but when I look at the pictures below, I see just how far we have already come. If nothing else, we have filled four dumpsters with trash and deconstruction debris…that’s something, right?
So, are you wondering what we’ve done to the schoolhouse?
First, we gutted the entire schoolhouse down to the studs which included:
- Taking down all walls and ceilings
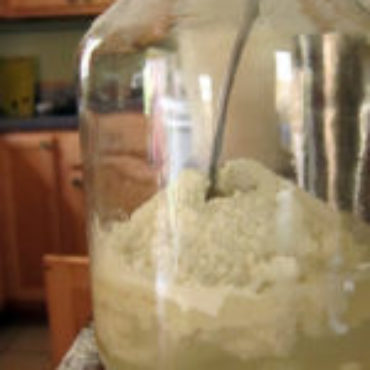
- Getting all the nasty insulation out
- Putting in a structural beam to support the new ceiling height
- Taking out the old bathroom and rebuilding the back wall
- Removing a chimney
- Adding a loft for our future guests
- Fixing the well and installing a new pressure tank
Read on and I’ll show you what all that work actually looks like.

Walls removed and ceiling raised!
Removing a chimney
Taking a chimney down was a first for me, but thanks to my obsessive watching of This Old House, Fixer Upper, and numerous other home renovation shows, I knew exactly how to do it! You just start at the top and take out one brick at a time.
The final step is not forgetting to patch the roof! It is super easy in the grand scheme of home projects. The work went surprisingly fast and, in about a half a day, we got it down to ground level. The biggest challenge now is finding projects for broken bricks.
Don’t worry we will use them all!
Do you know any fun brick projects?

The Helmet was her idea. I love safety but that seems like a bit much.
Getting the kids to participate in building the schoolhouse
Once the chimney was at a safe height, I let the kids have some whacks at it, too! One of my favorite parts of this project is having the kids participate in each step. They are usually very eager to help and learn, even if it is only for 30 minutes at a time. It has become a regular part of our homeschool learning. They regularly help drag boards and loads of trash out of the place.
I even had my first kid cutting boards out of the back wall with the sawzaw!
Every time they come to visit, we review the plans and discuss what’s going where, how we’ll do it, and what we need to make it happen. I love that they get to see our family’s dream come to fruition.

Replacing the walls in the back
So, now that everything is cleared out, we are working to replace any rotten wood that remains.
We rebuilt the back wall and replaced old rotten boards with new, pressure-treated, wood, and a vapor barrier on the floor. The old floor had rough sawn lumber sitting directly on concrete. In case you were wondering…that gets rotten pretty quick. This was also the site of the old bathroom. Whoever installed the shower did not put any sealant around the drain so, every time someone took a shower, a lot of water went on to the floor and soaked into the surrounding walls.
By the time we got the house, the walls in this area seemed to be holding the roof up more by force of habit than actual structural integrity. But, that’s all fixed now!

The “before” picture
The loft is underway
We started working on the loft. Part of this plan is to have a place for people to spend the night. Want to be one of our guests? Hopefully, by next spring we’ll have it available for visitors!
Other goals for the space include possibly having it available as housing for an intern or 2 that can help us maintain the grounds. Perhaps we will even host a visiting artist or musician. Then again, it may simply remain as an extra place for friends and family to stay.
Or sometimes just an extra place for friends and family to stay.
This simple loft will give us space for a few beds, and that’s about it. It’s not going to be fancy, but it will certainly be charming.

The loft floor/kitchen ceiling
Which do you like better white or wood?
To make the floor of the loft, we are reusing the wood “shiplap” that we took out of the house. One side is raw pine and the other is painted “vintage white”. Since the floor will also be the ceiling of the tiny kitchen, we are going to use the white side as the ceiling.
Looking through the old rough-cut beams to the whiteboards really keeps a fun farmhouse vintage look going. What they don’t show you on the fixer-upper shows is that you have to take all the nails out of each board. It was a great opportunity to teach my fourth kid how to remove nails with his trusty hammer.
We needed about twenty-six boards for the loft floor. Each board had about 15 nails in it. To get these out, we had to hammer the nails back out of the board, then flip the board over and pull the nails out. It took about five minutes per board. It was slow going but completely worth the time in order to reuse the old wood.

He has his own hammer now. Very rarely does it get used to help.
It’s more of an experimental hammer.
The well is up and running
One last improvement…we got the well and pressure tank hooked up! This was our big investment for the month. With summer coming and future developments in the works, we need to have water up there. We are slowly moving the sheep up to the pasture and soon we will be moving our egg-laying crew up there as well.
Schoolhouse Coming Soon!
Once we have the floor done, we plan to add a dormer and window at the end of the loft so we’ll have a little more headroom around the beds.
Classes this fall (or sooner!)
Classes haven’t started at the new site yet but, hopefully, by late summer or early fall, we will begin hosting permaculture design classes up there. What classes do you want us to offer? How about a brick oven building class?

This is my dream oven. Want to come make it with us?

Want to join us on the Schoolhouse Project? Then stay tuned to more updates about it!
You can also join us in our community to get to know more about other stuff we are doing aside from the schoolhouse!
Want more information on better living dropped right into your inbox? Sign up below and we’ll send it your way.
activecampaign form=25]


Add Comment